Thursday, 28 July 2011

My X-Factor Moment - The Unveiling of the Caterham Painting


I can honestly say that this was my X-Factor moment! After so much hard work the painting was finally presented to the school on Tuesday 5th July. It has been a pleasure working with the school so far (there are two more paintings in the pipeline) and everyone has been so excited about the Bicentenary since the preparations began.

I was very fortunate to be at the right place at the right time when the school was actually looking for an artist. I was talking to one of my dear students (Karen) about how I would love to paint an old school with history when she suggested I approach David Clark at Caterham School. He has been instrumental in putting the Bicentenary jigsaw pieces together. Karen is an English teacher there. I decided to go for it and I sent him an email and I got a very positive reply. I took my portfolio along to the meeting and all went extremely well. David took me for a thorough tour around the school. I then came back with my camera for another look around before heading back to the studio to put some ideas together.

After 'thinking' the layout through with the help of a drawing, I painted a rough sketch of what the painting would look like to enable the key people to visualise where I was going with it. Once approved, I set about ordering my beautiful canvas and then I allocated my start in the following year's diary. I made frequent trips to the school and also met up with David Clark and Julian Thomas (the Headmaster) so that they could keep an eye on my progress. It was a long process because the painting was very detailed and, being an oil painting, it took a number of hours to achieve the level of representational detail that best reflected the school.

I think that my friends and students thought I had left the planet as I had to disconnect my phones regularly throughout the summer of 2010 to concentrate on what I was doing. Being an energetic person, this was very difficult indeed. Had to be done!

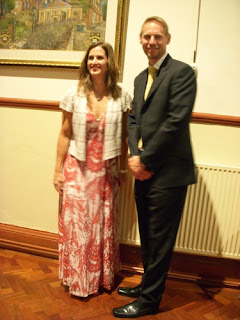
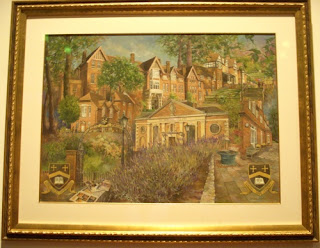
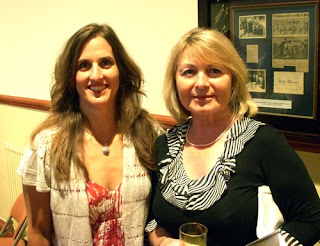
The picture at the top was taken after I had unveiled the painting and I am standing there with Julian Thomas, the Headmaster. The middle picture is, of course, the painting which was so beautifully framed by Danielle Brewster who is with me in the third picture. Her level of skill is out of this world and I know that any painting I give to her to frame is in the very best hands.


Monday, 25 July 2011

The Underpainting & First Stages

There is always a great deal of excitement that grips the core of one's belly when the first brush strokes are applied. It is the start of something new and the knowledge that the painting might alter en route. A painting has a life of its own and I still love how an image miraculously emerges out of its 2-dimensional surface.

The surface itself was chosen carefully. I used a very good quality textured oil primed linen canvas. It was a treat to paint on it from start to finish. My underpainting was painted in 3 colours chosen for their fast drying properties, temperatures and tonal values. I enjoy all stages of a painting's development and the underpainting is no exception. Raw umber is usually used on its own but I include cobalt blue which, when mixed with raw umber, cools it down and provides me with a darker tonal value. Naples yellow is added to the raw umber to lighten it and provide yet another part of the colour wheel. One can also include some greens when the naples yellow and cobalt blue are added together. I tend to weaken the mixtures with a little turpentine so that the layer remains very thin. I am careful not to make it watery - it is best to push the paint as far as it will go so that the application feels dry rather than runny. You will find that you can start your 'proper' layers after a day of applying the underpainting.

The underpainting also allows you to place your subject correctly and problem solve challenging areas. You can still see a lot of my rough underpainting in the above image.

I then started blocking in the sky and the bigger building shapes to get a feel for the midtones. It is worth your while premixing your colours before you start. It does take time and can seem very tedious but it does mean that when you start painting you don't spend time (and muddying your brushes) trying to find the right colour. Even though I keep my palette simple to begin with (white, cadmium yellow, naples yellow, yellow ochre, cadmium red, permanent rose, cobalt blue and black), there are subtle sways between the primaries in almost any colour you see in front of you. Mixing with a brush is not always effective and we don't mix enough paint. Premixing also tends to get one 'into the mood' because it is a tactile experience on all levels. It also gives you a chance to think before plunging in.

Friday, 22 July 2011

The Painting Process

I have started to add the detail after completing the underpainting. It is an exciting stage as one starts to see a painting's potential. It is pretty gruelling too as proportions and perspectives need to be checked and double checked. I do love it when one starts to apply colour to the muted raw umber back drop. It puts one on an instant high. As you can see there are still plenty of areas to fill and the painting did undergo a number of subtle changes. My palette is quite 'earthy' - stronger and brighter colours were added later once the initial tone and proportions were resolved.

Middle Stages - Adding Spots of detail

The painting is coming together slowly. As you can see, I still had various corners and blank areas to fill. Most of the relevant detail has already been added. I just needed to figure out how to link one area to another without it looking awkward e.g. where the old library roof overlaps the prep school had potential issues, as well as the modern water feature that sits in front of the library. Plenty of patience and thought required. I enjoy being challenged though ... so bring it on.

Nearing the Finish Line

I was just about there and had been painting for many hours. Most artists who paint for long periods of time would probably have experienced an eye or two twitching from muscle fatigue. It is a pest. As I was saying, I was just about there, but I needed to solve the space under the gate. There was only so much foliage one could place there, and being a gate, and hence an entrance, foliage did not make sense. I had an idea to use the school leaflets as 'stepping stones'. They also added some primary colours and branding to the painting. I also enjoy painting packaging and still lives, so once I had set up my leaflets in the studio, I was happily rearing to go.

200 Years of Caterham School

The finished painting photographed by a professional photographer in East Grinstead. It then went to the printer who printed one hundred 40x50 cm images for sale as part of the bicentenary. It was such a wonderful and exciting learning curve.

Looking at You

This artwork resulted from a full day workshop, where we combined pastel pencils with an acrylic wash. It was such an enjoyable day and everyone went home feeling that they had achieved something. Mixed media can be associated with gimmicks and 'quick fixes', but this combination still requires you to know your tonal values and drawing skills. We used a special paper which allows one to apply wet acrylic washes (underpainting) and it has a tooth which allows the pastel to adhere to its surface. (Spectrum Colourfix Paper).