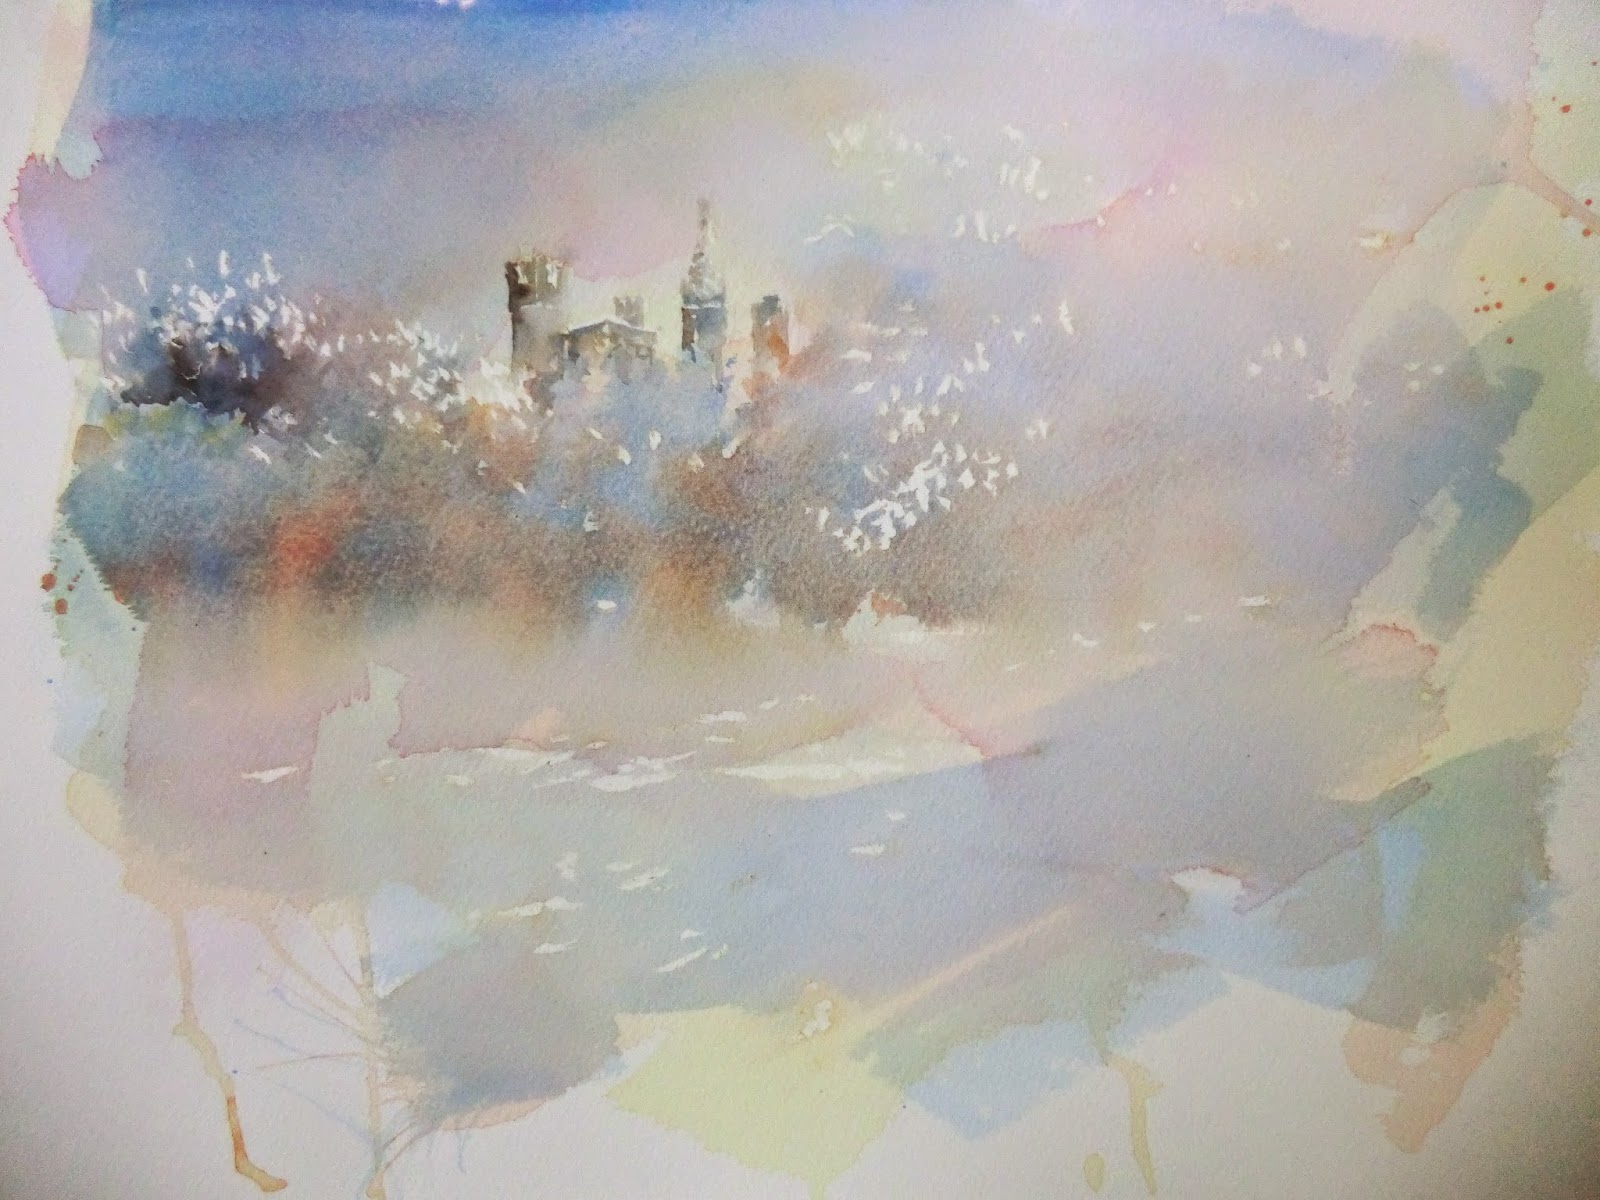
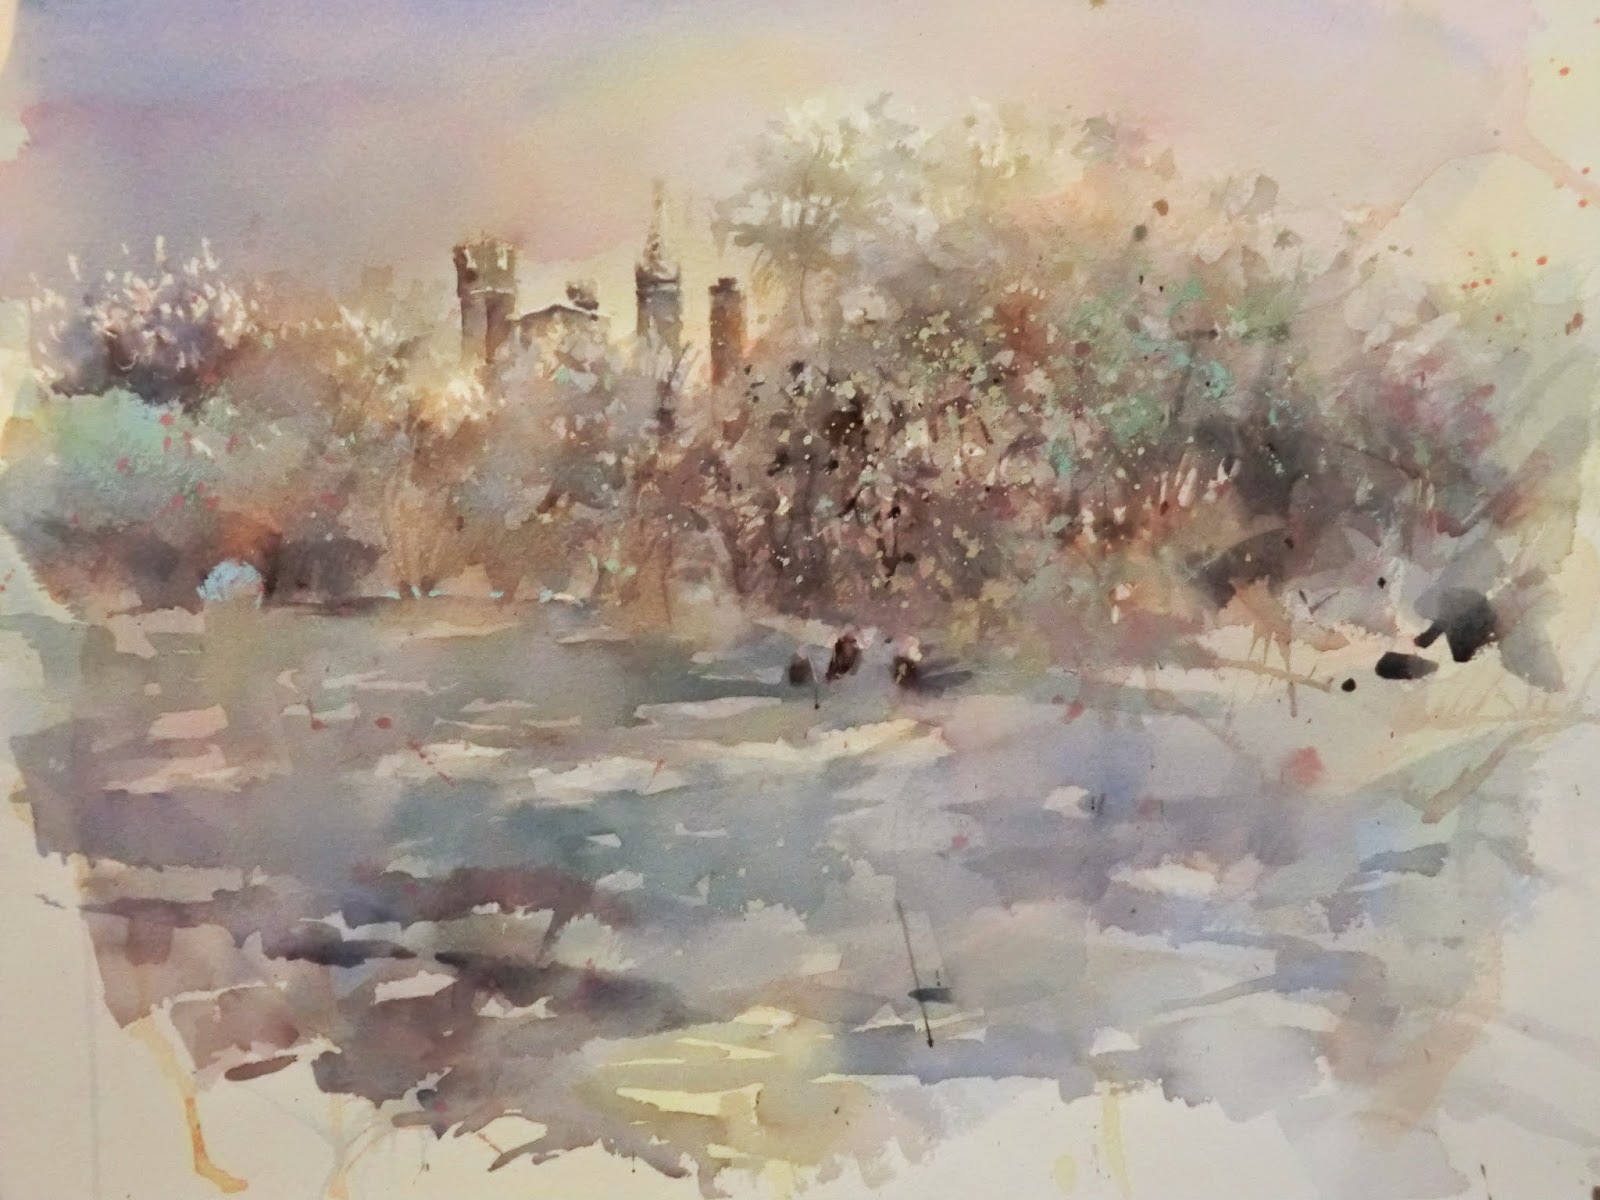
I worked together with the Jacksons Art Group to create this subtle magical painting. A welcome challenge for all of us as we were tested once again on our ability to manage washes and traditional watercolour techniques.
There is so much you can do with the magical “white” view of Cardiff Castle. Whites only come to life when you wrap them in tone and colour. I cannot take credit for taking this photo myself. I am a great supporter of “paintmyphoto” which supplies me with photographs that I cannot take myself.
DAILY PLAN
This is a challenging subject that offers many wonderful outcomes and creative interpretations. I plan on putting my washes to work in order to establish the ground work for my “whites”. Please do have masking fluid at the ready as it is an important ingredient in the early stages. I also advise that you have a small, old paintbrush to apply it with. You will get a better variation of “masking” markings which you will be grateful for later on. Once again, we have two mornings to create our masterpiece, so one step at a time.
MATERIALS: Please read it through carefully
Paper: Ideally a big sheet or block of good quality paper i.e. Arches, Saunders Waterford, or Fabriano 300gsm. If you are using a single sheet (bring in a board for support), then it should be prestretched or ideally a heavy weight i.e. 640gsms. Cold (N) pressed. 12inch x 16inch or bigger.
Drawing Equipment: Sharpener, blu tack, masking tape, and an HB or 2B pencil or coloured pastel pencil.
Watercolour Gear: Brushes - I tend to use a big wash brush - size 30, a selection of medium filberts and rounds and a sable liner or rigger for detail). Palette with big mixing wells, water spritzer bottle with fine spray, kitchen towel.
Colours - tubes are easier: lemon yellow and or quinacridone gold, cobalt blue (or french ultramarine), cerulean blue, sap green or russian green, permanent rose, cadmium red, winsor violet, indigo or paynes grey and raw umber. There are many alternatives so feel free to substitute your own colours for the ones above.
Other: Masking fluid, small old paintbrush, and white gouache (only for those who might need to restore a few highlights during the last stage).

- Simple drawing suggesting the buildings and baseline of trees.
- Only apply masking fluid where necessary ... roofs of the buildings and small amounts on trees and snow in foreground. Better to use old, small watercolour brush. Coat the brush in fairy liquid first - it is easier to remove masking fluid once finished. Make sure m.f. is dry before painting.
- We then applied VERY light washes of quinacridone gold and permanent rose using a big wash brush (diagonal strokes). Let the wash dry completely and apply a weak layer of cerulean and cobalt over it. Let that dry and see if you need any other layers of pink or blue.
- We then added a few more wet washes to the treed area adding blue and wet-in-wet drops of orange. (can mix cad red and quin gold). This helped to warm up the tree line and bring it forward.
- I used mixtures of cad red and cobalt blue to ‘fill in’ the buildings and add tone to the upper tree line.
- Once dry it is safe to remove the masking fluid. (I rub blu tack over the fluid and it takes it off easily).

- Stage Two was all about establishing tone and texture in the trees and foreground. Patience is a must as it takes time to build up the fine branches .... the only form that knits the painting together. I used a little indigo in my mixes to establish the middle ground.
- Darker shadows and objects were strategically placed and I made sure they ‘dissolved’ into their surroundings.
- A big brush was then put to work to describe the vast foreground of snow. Quite tricky as it can look like water instead. Make sure the brushstrokes are varied and that you use a selection of diagonal strokes rather than horizontal ones.
- Softer shades were applied all over using mixes of gouache, naples yellow, cerulean blue and cobalt green. Bold flicks are great fun and help to break up the tree line and create the illusion of snow.


